If you’ve heard of ChatGPT but aren’t sure what it does or how to use it, this guide is for you. ChatGPT is a powerful AI chatbot by OpenAI that can help you write, learn, plan, and brainstorm faster. Whether you want to ask questions, analyze data, or talk to it like a smart assistant, learning how to use ChatGPT is easier than you think.
This tutorial-style guide walks you through every step — from getting started on the web, mobile, or desktop to using voice, images, and data tools that make ChatGPT more interactive.
What Is ChatGPT and How Does It Work?
ChatGPT is an AI chatbot built by OpenAI that uses advanced language models to understand text and respond conversationally. It feels like chatting with someone who knows almost everything about any topic.
Definition and Core Capabilities
ChatGPT is powered by OpenAI’s GPT-5 model, which stands for Generative Pre-trained Transformer. It’s trained on large amounts of text so it can understand questions and generate human-like responses.
Here’s what it can do:
- Write and edit text such as essays, emails, and articles
- Summarize documents or explain complex ideas
- Generate code and fix errors
- Help with study notes or interview preparation
- Translate or explain foreign language phrases
- Offer creative suggestions like captions or outlines
Think of ChatGPT as a multi-purpose assistant that helps with writing, learning, and problem-solving.
How ChatGPT Understands and Generates Text
ChatGPT doesn’t “know” facts the way people do. Instead, it predicts the next word in a sentence using context. When you ask it a question, it matches patterns from its training data to generate relevant answers.
The model understands meaning through entities and relationships. For example, it knows “NYC,” “New York,” and “the Big Apple” all refer to the same city. This semantic awareness helps it respond naturally.
How to Use ChatGPT on the Web and Mobile App
Here’s a summary of how to get started with ChatGPT:
1. Visit chat.openai.com or open the ChatGPT mobile app, then sign up or log in — it’s completely free to start.
2. If you’re a Plus subscriber, pick the AI model you’d like to chat with.
3. On the ChatGPT home screen, type your text prompt, upload an image, or use voice input to ask your question.
4. Once ChatGPT replies, you can choose what to do next:
- Edit your original prompt
- Send a new question or follow-up
- Check reference links (when available)
- Copy the full response
- Regenerate a new version of the reply
- Give feedback with a like or dislike
- Share the answer directly
- Open and edit the output in a separate canvas
Now that you know the basics, let’s go over the detailed steps of using ChatGPT more effectively.
1. Create your OpenAI account
To start using ChatGPT, you’ll need a free OpenAI account. Head over to chat.openai.com and click Sign up. You can register with your email or simply continue with your Google or Microsoft account.
If you sign up using an email, OpenAI will ask you to verify your phone number to confirm that you’re an actual person (and not, fittingly, a bot).
Already have an account? Just hit Log in and you’re ready to start chatting.
Note: If you’re having trouble creating an account or signing in, try refreshing the page first. If that doesn’t work, visit OpenAI’s help center for detailed steps on how to fix common login problems.
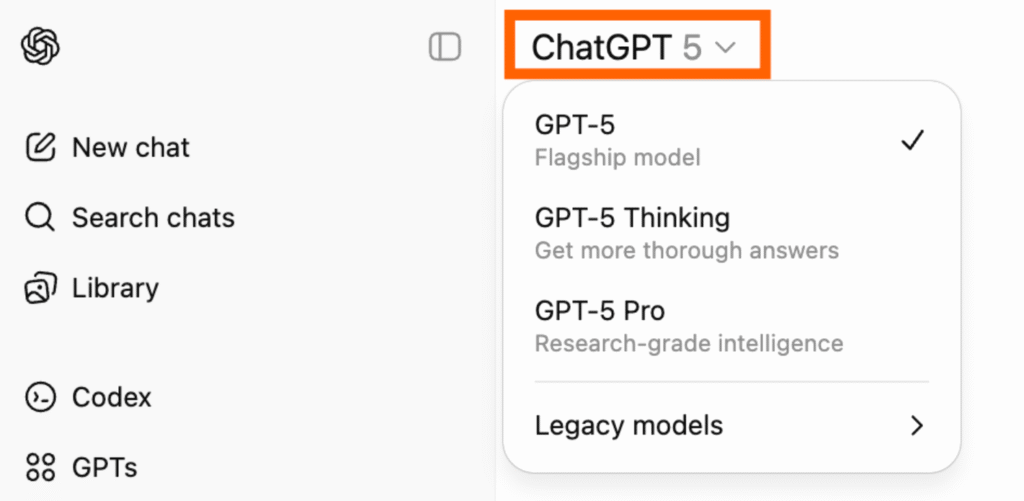
2. Choose your AI model
If you’re a paid subscriber, you can pick which AI model runs your ChatGPT chats. Just open your conversation window, click the model dropdown menu, and select the version you’d like to use.
3. Ask ChatGPT a question
You can interact with ChatGPT using different types of prompts.
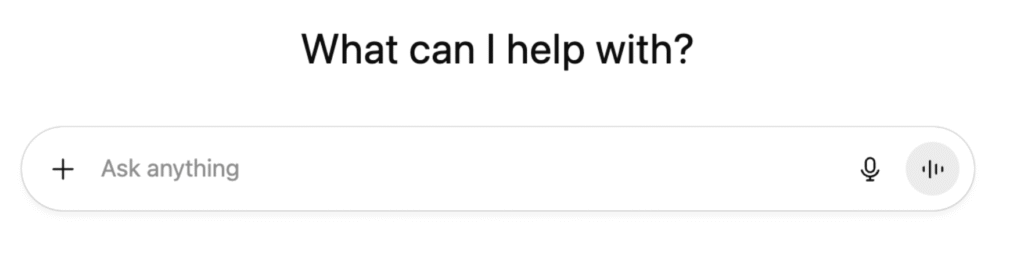
- Type your message or question in the ChatGPT text box on the homepage, then press Enter or click the arrow icon to send it.
- To have ChatGPT search the web for fresh, up-to-date information instead of relying only on its built-in knowledge, click the plus (+) icon next to the message bar, choose Web Search, and enter your query.
- For more detailed, source-backed answers, use Deep Research. Click the plus (+) icon, select Deep Research, and type your request. ChatGPT will review multiple online sources and provide a thorough, cited summary.
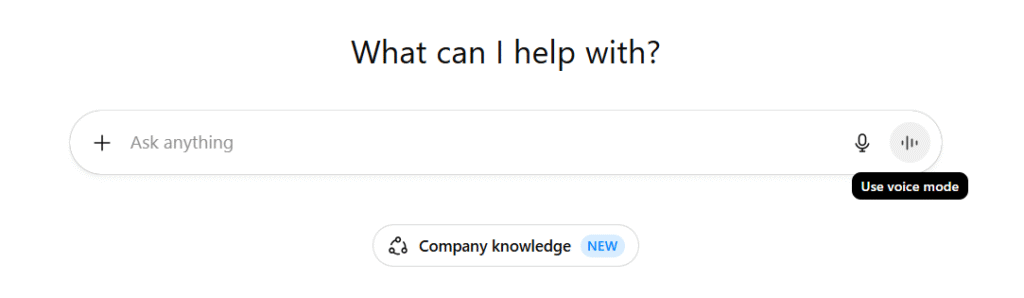
- To speak to ChatGPT, tap the Voice Mode button in the message bar or use the microphone icon to dictate your question using speech-to-text.
- To add an image or file, drag it from your computer into the message bar, or click the plus (+) icon, select Add Photos & Files, and upload your document or image.
4. Interact with ChatGPT’s responses
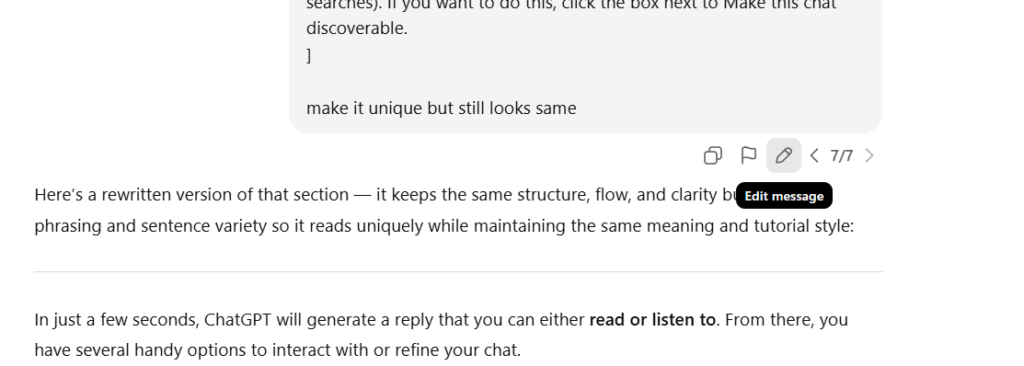
In just a few seconds, ChatGPT will generate a reply that you can either read or listen to. From there, you have several handy options to interact with or refine your chat.
- Edit your previous prompt. Hover over your message and select the pencil icon to make changes. Adjust your text, hit Enter, and ChatGPT will refresh the answer based on your new prompt.
- Start or adjust a new prompt. Type or speak another request, or ask ChatGPT to refine its earlier answer. It automatically remembers the ongoing conversation, so you don’t have to restate everything from scratch.
- Check the sources. If you see a small source tag in ChatGPT’s response, hover over it to preview where the information came from. Click the tag to open the source directly for more detail.
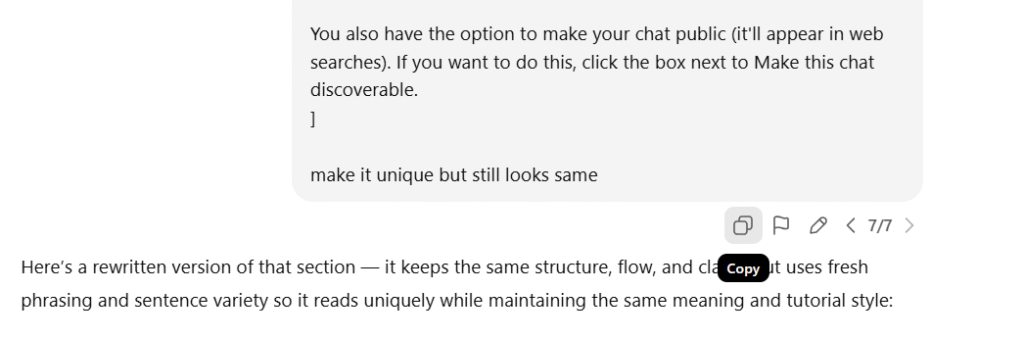
- Copy a response. Want to share or save what ChatGPT said? Click the Copy icon below the reply you like. Once copied, the icon will briefly change to a checkmark to show it worked.
- Regenerate the answer. If the reply doesn’t quite fit what you need, click Try again to have ChatGPT produce a fresh version of the same response.
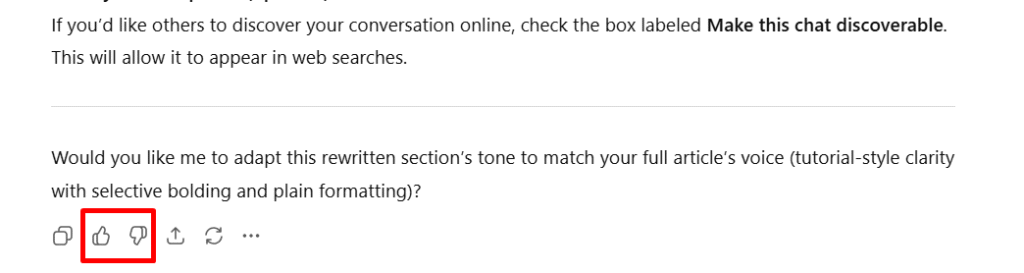
- Rate the answer. ChatGPT can’t read your expressions, so it depends on your feedback. Click the thumbs up or thumbs down icons to tell it whether the response was helpful. This helps improve future outputs.
- Edit in a separate workspace. If you want to polish or expand the AI’s output, click Edit in Canvas. This opens the text in its own editable document where you can tweak or build on it freely.
- Share your conversation. Instead of taking screenshots, you can share an entire ChatGPT conversation. Click Share at the top of the chat window, and you’ll get a unique link to that specific thread. Anyone with the link can view it.

Note: Enterprise users can only share chats within their organization.
If you’d like others to discover your conversation online, check the box labeled Make this chat discoverable. This will allow it to appear in web searches.
How to download and use the ChatGPT desktop app
You can also chat with ChatGPT using the desktop app, which works on both macOS and Windows. Before you begin, you’ll need to install the app on your computer. Keep in mind that the installation steps vary slightly between Mac and Windows, but once it’s set up, the features and experience are the same.
How to use the ChatGPT desktop app
Here’s how to get started with the ChatGPT desktop app on any computer.
1. Open the ChatGPT app. You can also launch it instantly with a shortcut: press Option + Spacebar (Mac) or Alt + Spacebar (Windows) to bring up a small launcher window where you can start typing right away.
2. Enter your prompt. Type directly into the message bar, or click the microphone icon to dictate your message using voice-to-text.
3. Have a live chat. Select the voice chat icon to start talking with ChatGPT in real time. (If you want to learn more about voice chats, check out the section on using ChatGPT Voice.)
4. Upload files or photos. Tap the plus (+) icon to share a document or image. You can even snap screenshots or photos from your desktop camera and discuss them immediately—a feature exclusive to the desktop app for now.
How to customize ChatGPT
If you catch yourself repeating the same directions to ChatGPT every time—like “Answer in Python” or “Use a friendly tone”—you can skip that step. ChatGPT lets you save your preferences so it automatically responds the way you want, whether you’re on the free or paid plan.
How to use custom instructions in ChatGPT
If you’re using the free version of ChatGPT, you can still create custom instructions to guide how it responds every time you start a new chat. This feature helps you personalize ChatGPT’s tone and style. Here’s how to set it up:
- Open your profile menu and select Customize ChatGPT.
- In the pop-up window, turn on the Enable for new chats toggle.
- Fill in the fields with details that help ChatGPT adapt to you. For instance, describe your tone or writing habits under “What traits should ChatGPT have?”
- When you’re done, click Save to apply your settings.
Unless you turn off custom instructions or specifically tell ChatGPT not to follow them in a prompt, it will automatically apply your saved preferences whenever it replies.
Tip: If you want ChatGPT to handle multiple roles or tasks separately, create individual ChatGPT projects and set unique custom instructions for each.
How to create a custom GPT
If you’re a paid ChatGPT subscriber, you can use plain language to build your own custom GPT—a personalized version of ChatGPT with specific rules and behavior. You can also choose from ready-made options like Data Analyst or other prebuilt GPTs. If you’re on the free plan, you can still use existing GPTs, but you won’t be able to create new ones.
Here’s a fast overview of how to build a custom GPT (for a deeper walkthrough, check out our full beginner’s tutorial).
- Open ChatGPT and look at the left sidebar. Select GPTs from the menu.
- In the top-right corner, click Create to start building.
- On the creation screen, type your setup instructions in the message field. Chat with the builder until it behaves the way you want.
- Select Configure to access advanced settings. Here you can rename your GPT, fine-tune its responses, upload reference files, or connect actions for automation.
- When you’re satisfied, click Create again, choose how you want to share it, and then hit Update.
- You can also use your custom GPT anywhere in ChatGPT by typing @GPTname followed by your message in any chat window.
How to use ChatGPT Voice
You don’t have to stick to typing when chatting with ChatGPT — you can actually speak directly to it. The responses come so quickly that it almost feels like a live conversation.
Here’s how to use ChatGPT’s voice feature in the desktop app (it works similarly on web and mobile):
1. Open a ChatGPT chat window. Click the voice icon in the message bar — it looks like small vertical sound waves. Start talking, and ChatGPT will reply out loud in real time.
2. A small black dot will show up on your screen. When it starts pulsing in a wave pattern, that’s your signal to begin speaking your prompt.
How to upload and show images to ChatGPT
- Tap the plus (+) button in the chat bar.
- Choose how to add your image — either upload one from your device or snap a new photo or screenshot right inside the app.
- Type your message or question that goes with the image.
- Press Enter to send it.
How to upload images to ChatGPT from the mobile app
- Tap the plus (+) button in the message bar.
- Choose how you’d like to share an image — either upload one from your gallery or take a new photo.
- If you want ChatGPT to focus on a specific detail, draw or mark that area on the image before sending.
- Tap Next to confirm your selection.
- Type your message or question, then tap Send to submit both together.
How to use ChatGPT’s non-chat features
How to use Projects in ChatGPT
Projects in ChatGPT let you organize your related conversations, memories, and custom instructions into focused groups. It’s like having separate workspaces where ChatGPT automatically adapts its context when you switch between them.
1. To create one, open the ChatGPT sidebar and select New Project.
2. Give your project a name, then click Create to set it up.
3. Once your project is ready, you’ll see several options for managing and customizing it according to your workflow.
- Start a conversation. Type your message in the chat box and begin interacting with ChatGPT just like you would in a normal conversation.
- Attach reference materials. Select Add files to upload any documents or data you’d like ChatGPT to use for that particular project.
- Set custom guidance. Click Add instructions, then enter any details or context specific to your project so ChatGPT can respond accordingly.
To see the history of a project, click its name in the sidebar. All related conversations will appear in the main workspace.
How to use ChatGPT scheduled tasks
- Enter your prompt just like you normally would, then ask ChatGPT to display the answer as a canvas or to “create a document.”
- ChatGPT will generate the response inside a page view right on your screen.
- To make changes, simply click Edit at the top of the page.
- Your document will open on the right side of the screen, while your main chat remains visible on the left.
- You can type edits directly in the canvas or highlight any section to refine specific parts of the text.
How to use ChatGPT Agent
ChatGPT Agent is an AI-powered assistant that can browse the internet and handle digital tasks for you. It can do things like fill out online forms, download files, or even create memes on command. That barely scratches the surface of what ChatGPT Agent can do, but you get the idea.
To try it, open your tools menu and choose Agent, or simply type /agent in the message bar. Then describe what you need done, and it will execute the task automatically.
The feature is still in beta testing, so hands-on access is limited for now. However, the demos showing ChatGPT Agent in action look impressive and suggest big potential once it’s fully released.
Can ChatGPT refuse to answer my prompts?
OpenAI has stated that its goal is to ensure AI remains safe and beneficial for everyone. To support that mission, it has built several guardrails into ChatGPT, such as refusing to answer prompts that are inappropriate, harmful, or break laws.
When I asked ChatGPT directly, “Are there any prompts you won’t respond to?” it explained the kinds of requests it’s designed to decline.
I will decline requests that:
- Cause harm or danger. I will not provide instructions for making weapons, explosives, or other hazardous materials, nor assist with content that promotes self-harm, suicide, or violence.
- Expose private or sensitive information I will not generate or reveal personal, confidential, or financial data (for example passwords or credit card numbers), nor fabricate or share private communications or impersonate real people.
- Violate legal or ethical boundaries I will not help create deepfakes of real people without consent, produce plagiarized or copyrighted material in full (such as complete song lyrics or book chapters), or give advice that enables illegal activity (for example tax evasion or hacking).
- Include explicit or abusive content I will not produce sexually explicit material involving real people, content that harasses or promotes hate, or graphic gore and violent depictions.
- Be a misuse of my capabilities I will not continuously monitor files or accounts (I only see what you upload here), provide exhaustive lists of documents you have not shared, or pretend to be a licensed professional (for example a doctor or lawyer) when I am not.
How to manage your data in ChatGPT
How to manage ChatGPT’s memory
ChatGPT’s memory feature works much like custom instructions, but with one big difference — you don’t need to spell everything out. Instead of manually telling ChatGPT what to remember or how to respond, it gradually learns your preferences on its own and adjusts its replies accordingly.
OpenAI notes that ChatGPT is designed to avoid storing or using sensitive information such as health or personal data. That’s why it’s always best to keep private details out of your chats. If you want extra control over what ChatGPT remembers, you can easily manage or clear its memory settings. The process is identical on both the web and mobile app.
1. Open your profile menu and select Settings.
2. Go to the Personalization tab.
3. Under Manage memories, choose Manage.
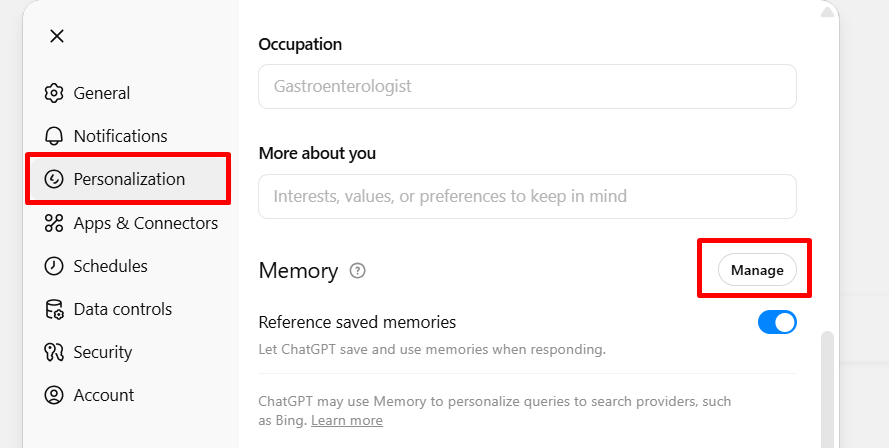
4. You’ll see two ways to control your saved memories:
- Remove individual memories: Click the trash can icon next to the memory you want ChatGPT to forget.
- Clear everything: Select Delete all to erase every stored memory in one go.
To completely disable ChatGPT’s memory, open your personalization settings and switch off the Reference saved memories option.
These preferences automatically sync to your account, so your changes apply on every device you use.
Important: Turning off memory and deleting old chats does not erase stored memories. The only way to fully remove them is to manually delete them in settings or ask ChatGPT directly to forget them. OpenAI may still keep temporary logs of deleted memories for up to 30 days for safety and debugging.
How to use temporary chats
If you ever want to chat without saving any memory or using stored context, you can switch to a temporary chat. This lets you talk freely without adding anything new to ChatGPT’s memory. However, your custom instructions will still apply during that session.
Here’s how to start one:
- Begin a new chat.
- Click the Temporary Chat icon — it looks like a small speech bubble in the top-right corner.
- You’ll notice the message bar turns dark, showing that you’re now in temporary chat mode.
How to turn off model training
By default, OpenAI may use your chats and memory data to help make its models smarter. If you’d prefer not to share this information, you can easily disable it through your settings on the web or mobile app.
- Click your profile icon, then choose Settings.
- Go to Data controls.
- Select Improve the model for everyone.
- Turn off the switch next to Improve the model for everyone. You can also decide whether to include your audio or video recordings in training.
- When finished, click Done to save your changes.
How to delete your ChatGPT conversations from a desktop
Here’s how to clear all your past chats in one go using ChatGPT’s web interface:
- Click your profile icon in the lower-left corner.
- Select Settings from the menu.
- Go to Data controls, then choose Delete all.
- When prompted, click Confirm deletion — remember, this action can’t be undone.
If you’d rather remove only certain chats instead of everything:
- In the ChatGPT sidebar, hover your cursor over the conversation you want to remove.
- Click the three-dot (⋯) Options icon.
- Choose Delete from the dropdown.
- When the confirmation window appears, click Delete again to finalize.
How to archive your ChatGPT conversations from a desktop
If you’d like your side panel to show only certain conversations while keeping the rest for later, you can archive chats instead of deleting them. This moves them out of view without losing any data, and you can bring them back whenever needed.
To archive a specific chat:
- In the side panel, hover over the conversation you want to hide.
- Click the three-dot Options icon (…).
- Select Archive.
You can also archive all your conversations at once:
- Click your profile picture, then open Settings.
- Choose Data controls.
- Under Archive all chats, select Archive all.
- Click Confirm archive when prompted.
To see or restore archived chats later:
1. Return to Settings.
2. Next to Archived chats, click Manage.
3. From there, choose one of three available actions.
- View: Select the conversation name to open it. From there, you can choose to restore it directly if you’d like.
- Unarchive: Press the Unarchive icon, shown as an upward arrow, to move the chat back to your active list.
- Delete: Click the Delete icon, displayed as a trash can, to permanently remove the conversation.
How to delete your ChatGPT conversations from the mobile app
Here’s how you can remove all your previous chats at once on the mobile app:
- Open the app and tap your profile icon to access settings.
- Select Data Controls.
- Choose Delete All Chats if you’re on iOS, or Clear Chat History if you’re on Android.
- Confirm when prompted.
To delete only certain chats instead of everything:
- In the ChatGPT menu, press and hold the conversation you want to remove.
- Tap Delete.
- Tap Delete again to confirm your choice.
How to archive your ChatGPT conversations from the mobile app
Here’s how to archive a single chat in ChatGPT.
- Press and hold the conversation title you’d like to store.
- Select Archive.
- Confirm by tapping Archive once more.
And here’s how to archive all your chats at once.
- Open your profile to access settings.
- Choose Data Controls.
- Tap Archive All Chats if you’re on iOS, or Archive Chat History on Android.
Here’s how to view or restore archived chats.
- Go to your profile and open settings.
- Select Archived Chats.
- Choose the chat you want, then tap View or Unarchive. You can also tap Delete to remove it permanently.
How to use ChatGPT: FAQs
What models does ChatGPT use?
At the time of writing, ChatGPT runs on several models, including GPT-5, GPT-5 Mini, and GPT-5 Nano. OpenAI updates these models frequently, so by the time you read this, a newer generation might already be available.
Is ChatGPT free?
Yes, you can sign up for an OpenAI account and use ChatGPT for free. However, the free version has limits — you may face message caps or reduced availability during high-traffic periods.
What’s the difference between free and paid ChatGPT subscriptions?
ChatGPT offers two paid plans for individual users: Plus ($20/month) and Pro ($200/month).
- Plus users get faster response times and access to premium models like GPT-5.
- Pro users enjoy priority access, advanced tools, and higher usage limits.
For a comparison of each, check out this article: Is ChatGPT Plus Worth It?
Can I search through my ChatGPT history?
Yes, ChatGPT includes a built-in chat search feature that helps you find past conversations quickly.
Here’s how to use it:
- Click Search chats in the left sidebar.
- Or use the shortcut: Command + K (Mac) or Ctrl + K (Windows).
- Type your keyword in the search bar.
- ChatGPT will show all conversations containing that term.
- Click any result to jump directly to that chat.
Can ChatGPT create images?
It can. ChatGPT now includes image generation directly within the app. Simply describe what you want to see, and it will produce an AI-generated image.
If you prefer to use the DALL·E model for more control or artistic style, you can select the DALL·E GPT inside ChatGPT’s interface.
Does ChatGPT have internet access?
Yes. All current ChatGPT models can browse the web to retrieve real-time information. This means you can ask about current events, new research, or anything that requires up-to-date data.
How accurate is ChatGPT?
ChatGPT is highly capable, but it’s not perfect. It can sometimes generate incorrect or fictional information, known as a “hallucination.” These errors are much less frequent now, but they can still occur.
You can ask ChatGPT to cite its sources or explain where it found specific details, allowing you to verify accuracy when needed.
Does ChatGPT remember past conversations?
Yes. ChatGPT keeps context within your current chat to maintain natural, ongoing dialogue. It can also recall information from previous sessions to personalize responses, such as remembering your name or writing style.
If you’d rather not store that information, you can disable memory or clear past chats in your data settings at any time.